How to Keep a Journal (in 3 easy steps)
- Open The Journal.
- Express yourself.
- Do it again tomorrow!
🙂
The Journal is designed to help you keep a journal–any kind of journal you want:
- a personal journal,
- a diary,
- a professional journal,
- class notes,
- or anything else!
Getting Started
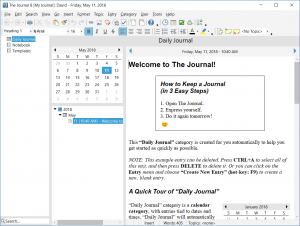
The Journal automatically creates two entry categories for you: “Daily Journal” and “Notebook”. Your categories are displayed in a tree on the left hand side. Click on a category to see the entries in that category.
Making Entries in “Daily Journal” 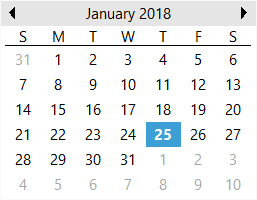
The Daily Journal category is a calendar (or “daily entry”) category. In other words, every day will have its own, unique entry. When you start The Journal, the entry for the current day is brought up automatically. You can type in this entry just as you would a word processor or text editor.
To create a past entry, simply click on a past date on the calendar. A new, empty entry will be brought up for you. The entry is not added to the “tree” of dates below the calendar yet, because the entry is empty. Once you begin adding text to the entry, then it will show up in the date tree.
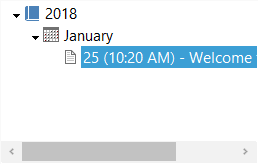 You can also create future entries just by selecting the date on the calendar and entering text. Future entries can always be edited–at least so long as they remain in the future.
As the days and weeks go by, your collection of entries will grow. In the tree of dates, your entries will be organized by year and month.
And don’t worry about empty entries. If you don’t actually type in an entry, nothing is saved.
Making Entries in “Notebook”
The Notebook category is a loose-leaf category. Unlike the Daily Journal category, the Notebook category entries are not tied to dates. Instead, the entries are named.
 To create a new entry, click on the Entry menu, choose Create New Entry, and then Document (or press F9). This will create a new document entry. Enter the name you want the entry to have and hit ENTER. You now have a new loose-leaf entry following the first one in the tree.
Press F10 (“Create New Sub-Entry”) to create a new entry as a sub-entry of the current entry.
A loose-leaf entry can have as many sub-entries as you want. Loose-Leaf entries can also be organized by dragging and dropping them in the tree.
Click on the second entry in the tree and “drag” it up to the first entry. Then release it. The second entry is now a “sub-entry” of the first entry.
This gives you the basics of creating and using entries in The Journal.
Using Categories
The Journal’s categories provide a powerful tool for organizing your journaling or other writing. Each category provides a separate “folder” of entries.
Creating a New Category
The Daily Journal and Notebook categories are created for you automatically, but you are not limited to just those. You can have as many or as few categories as you want.
To create a new category, click on the Category menu and choose “New Category…”
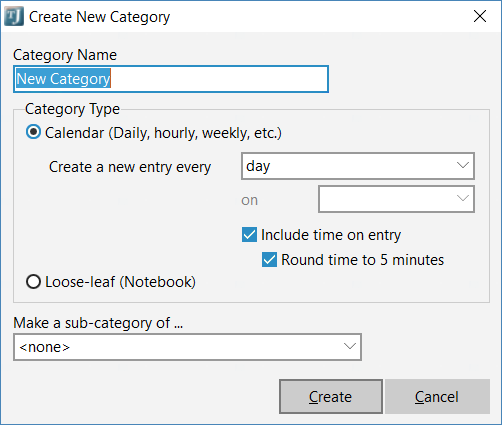
Enter the name of the category you would like, then choose whether you want a calendar category or a loose-leaf category. If you choose a calendar category, you will then have to specify how often you want the category to create new entries. Choose “Every Day” for now, and check the option “Include time on entry”.
When click on “Create”, this new category will be add to your collection of category tabs. Click on the new category in the list to make that category active.

You will see that this category looks much like “Daily Journal”. However, new entries in this category will automatically be “stamped” with the time of entry.
Plus, entries in this new category are totally separate from those of “Daily Journal”.
You can have as many different categories as you like, of either type, calendar or loose-leaf.
And that’s all there is to it!
Of course, if you have any questions at all, please don’t hesitate to ask: ![]() Email DavidRM Software
Email DavidRM Software
